
Is city beekeeping right for you?
Keeping bees in the city is popular for good reason. You get local honey and help pollinate a neighborhood that likely needs it. It isn't a casual hobby, though. Urban environments force you to deal with tight spaces and neighbors in a way rural keepers never have to.
Space is a primary concern. Unlike expansive rural properties, urban beekeepers often have limited room for hives and adequate flight paths. Neighbor relations are also critical. Bees can sting, and even well-managed hives can occasionally cause concern for those nearby. Finally, and perhaps most importantly, you need to thoroughly understand your local regulations.
I've seen the enthusiasm firsthand. Urban Beekeeper Honey in Oakland, California, for example, embodies this growing interest. They’ve built a successful business around urban hives, demonstrating that it can work – and work well – in a built-up environment. But their success isn’t accidental; it’s built on knowledge, careful planning, and a commitment to responsible beekeeping. Before you invest in a kit, be honest with yourself about whether you can dedicate the time and effort required.
It’s a commitment, definitely. But the rewards—fresh honey, thriving pollinators, and a deeper understanding of the natural world—can be incredibly fulfilling. Don't go in expecting instant honey production. It takes time, learning, and a willingness to adapt. Consider starting small, perhaps with just one hive, and gradually expanding as you gain experience.
Zoning and local laws
Beekeeping laws are surprisingly complex and vary dramatically depending on your location. What's permitted in one city might be completely prohibited in another. This is the first place you must start your research. Ignoring local ordinances can lead to fines, forced hive removal, or even legal action.
The best way to find your local regulations is through a zip code lookup. Many municipalities publish their beekeeping ordinances online. Search for “[your city/county] beekeeping ordinance” to begin. Pay close attention to rules about hive placement – often there are setback requirements from property lines and public spaces. Also, check for limits on the number of hives allowed per property.
Registration requirements are also common. Many jurisdictions require beekeepers to register their hives with a local apiary inspector. This allows the inspector to monitor hive health and provide assistance if needed. Don't overlook homeowner's association (HOA) restrictions, either. Even if your city allows beekeeping, your HOA might have its own rules that prohibit it. It's essential to review your HOA covenants before getting started.
Finally, remember that laws can change. It’s a good idea to periodically check for updates to your local ordinances to ensure you remain in compliance. Staying informed is a critical part of responsible urban beekeeping.
- Check your city ordinances for setback rules
- Look for setback requirements.
- Determine hive number limits.
- Verify registration requirements.
- Review HOA covenants (if applicable).
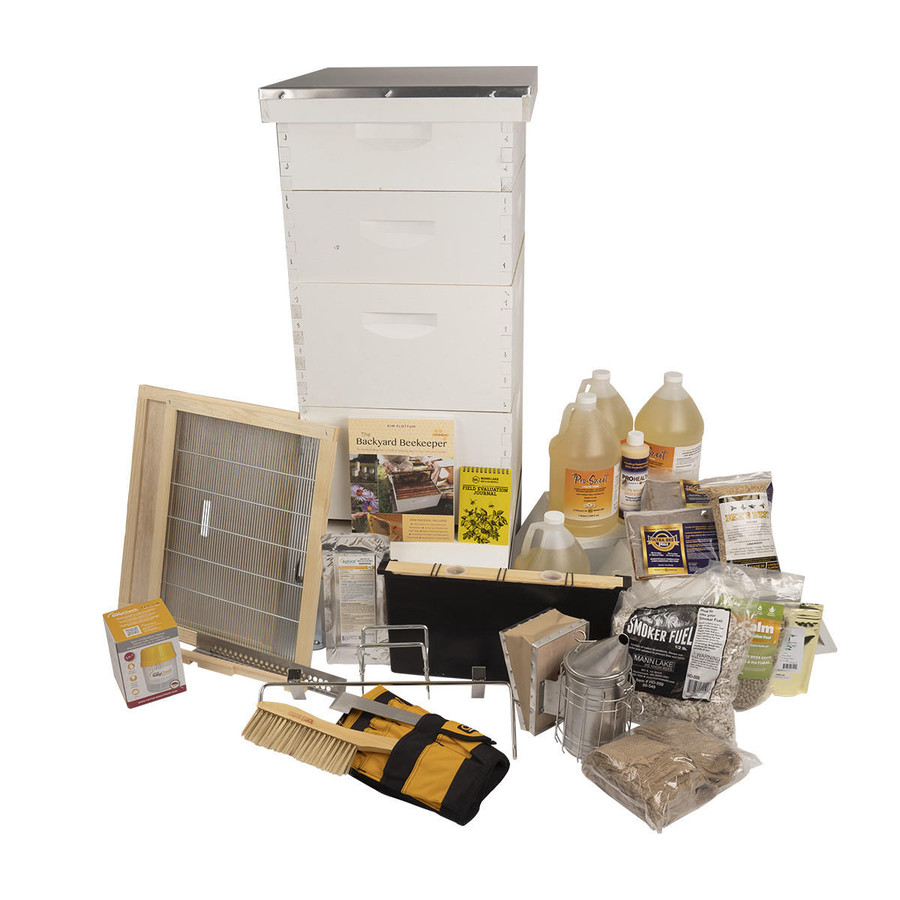
The 2026 gear list
Let’s talk equipment. A good starter kit will set you back somewhere between $250 and $600, depending on the components and quality. There are three main hive types to consider: Langstroth, Top Bar, and Flow Hive. The Langstroth is the most common and widely supported, offering standardized frames and plenty of resources. Top Bar hives are more naturalistic and require less lifting, but can be more challenging to inspect. Flow Hives allow for honey extraction without disturbing the bees, but they’re more expensive and aren’t necessarily better for the bees themselves.
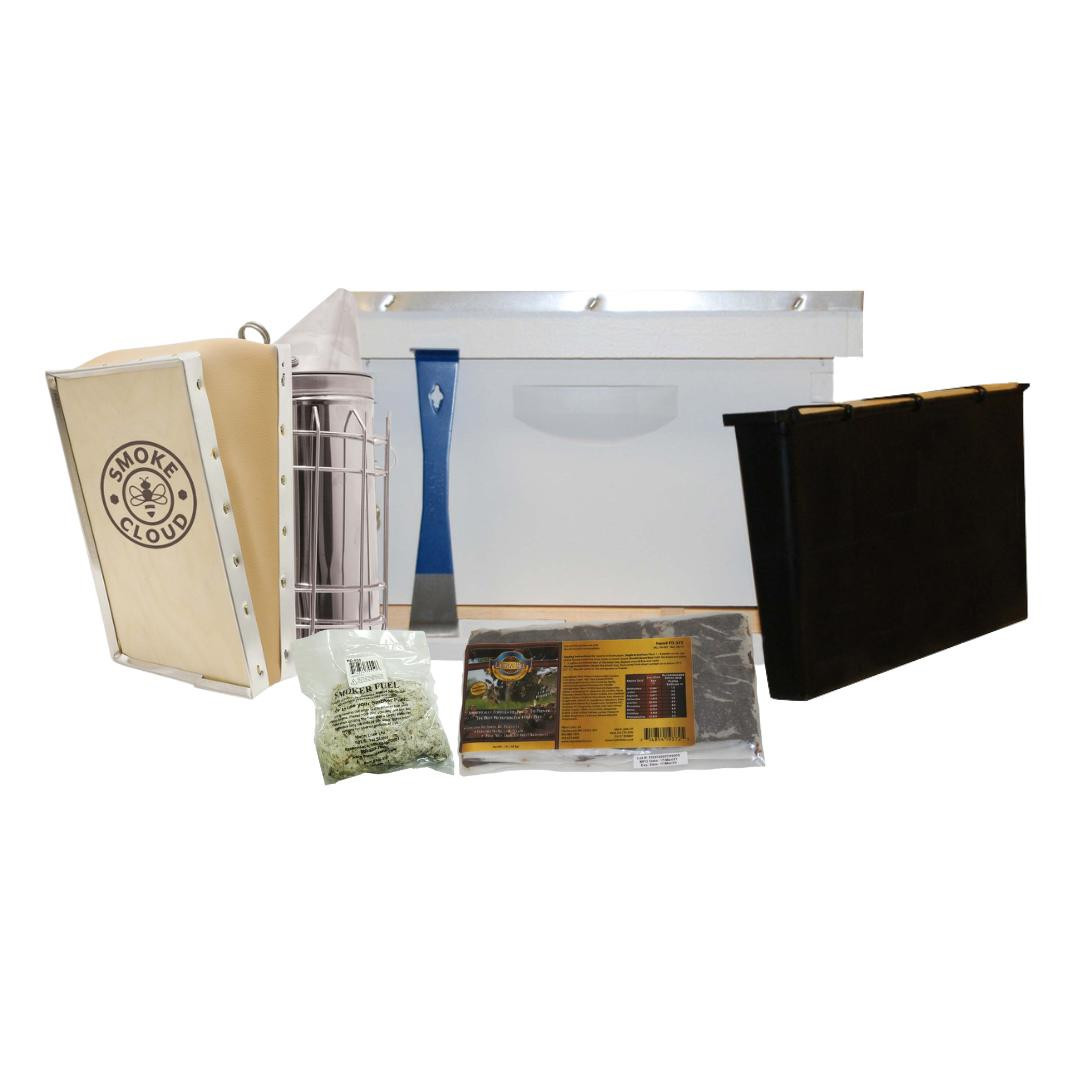
Protective gear is non-negotiable. A full beekeeping suit, including a veil and gloves, is essential to prevent stings. I recommend a well-ventilated suit to avoid overheating, especially during warmer months. Don't skimp on quality here; a durable suit will last for years. A smoker is crucial for calming the bees during inspections, and a hive tool is needed to pry apart hive components.
You will need feeders for new colonies or when flowers aren't blooming. Entrance and top feeders are the most common choices. I buy most of my gear from Betterbee because their woodenware holds up better than the cheap kits found on Amazon.
Beyond the basics, you may want to invest in a honey refractometer to measure moisture content, a bee brush for gently removing bees from frames, and a queen excluder to prevent the queen from laying eggs in the honey supers. But these can be added later as your experience grows. Prioritize the core essentials first.
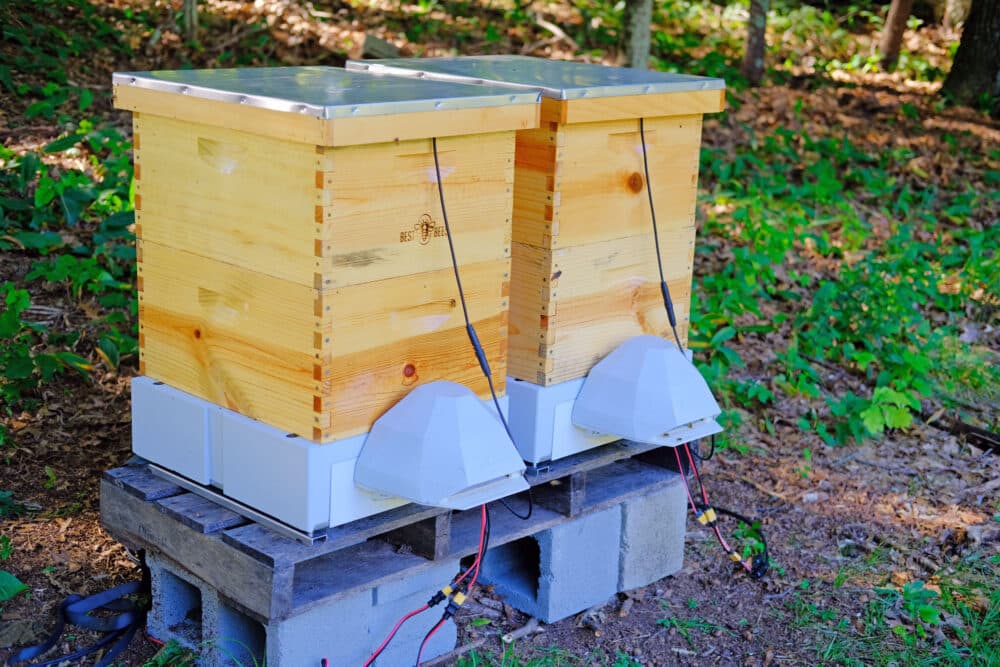
Hive Placement: Rooftops and Small Yards
Where you place your hive is just as important as the hive itself. Ideal conditions include a location that receives morning sunlight (to warm the hive), protection from strong winds, a nearby water source, and a clear flight path for the bees. The flight path is particularly important in urban environments; you want to direct the bees away from pedestrian traffic and sensitive areas.
Rooftop beekeeping presents unique challenges. Weight is a major consideration; a fully loaded hive can weigh over 100 pounds. Ensure your roof can support the weight and that you have safe access for inspections and maintenance. You’ll also need to consider wind exposure and potential water runoff. It's essential to notify the building owner and any relevant authorities before installing a hive on a rooftop.
For smaller yards, minimizing stings and maintaining good neighbor relations are key. Place the hive in a secluded corner of the yard, away from property lines and frequently used areas. Consider planting a hedgerow or fence to force the bees to fly upwards and over potential obstacles. The YouTube video from Berintan Bees demonstrates how they’ve set up their apiary in a built-up area, focusing on minimizing disturbance to locals.
Providing a water source is crucial. Bees need water to regulate the hive temperature and dilute honey for feeding. A shallow dish of water with pebbles or marbles will prevent the bees from drowning. Remember, happy bees are less likely to sting.
Bee Selection: Packages, Nucs, and Swarms
So, you've got the gear and the location sorted. Now you need bees! There are three primary ways to acquire a colony: purchasing a package, a nuc (nucleus colony), or catching a swarm. Packages are the most affordable option, consisting of a queen and several pounds of worker bees in a screened box. However, packages require more work to get established.
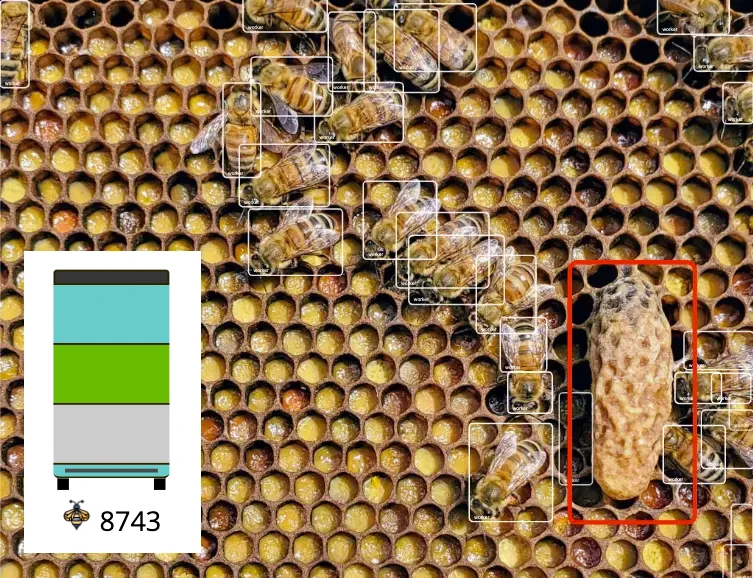
Nucs are more established colonies, containing a queen, brood, and a larger workforce. They’re more expensive than packages but have a higher survival rate. When selecting a nuc, inspect the brood pattern for consistency and look for signs of healthy bees (active foraging, absence of disease).
Catching a swarm is the most economical option – it’s essentially free! – but it’s also the most challenging. Swarms can be unpredictable, and you need to be prepared to handle them safely. It’s best to have some experience before attempting to catch a swarm. Regardless of which method you choose, source your bees from a reputable supplier.
Different bee breeds have different characteristics. Italian bees are known for their gentleness and honey production, while Carniolan bees are more resistant to diseases. Consider the climate and conditions in your area when selecting a breed. Local bee breeds are often the best adapted to your region.
Ongoing Maintenance: Inspections and Feeding
Beekeeping isn’t a one-time setup. Regular hive inspections are crucial for monitoring the health of your colony. Inspect your hive every 7-10 days during the active season (spring and summer). Look for signs of a healthy queen (eggs and young larvae), adequate food stores, and the absence of pests or diseases.
Common problems include varroa mites, hive beetles, and American foulbrood. Learn to identify these pests and diseases and implement appropriate treatment methods. There are various treatments available, ranging from organic acids to synthetic miticides. Always follow the manufacturer’s instructions carefully. Don't hesitate to seek advice from a local beekeeping mentor if you encounter a problem you can’t solve.
Supplemental feeding may be necessary during periods of nectar dearth (lack of flowering plants) or when establishing a new colony. Sugar syrup (a 1:1 mixture of sugar and water) provides carbohydrates, while pollen patties provide protein. Feed your bees as needed, but avoid overfeeding, as this can discourage them from foraging.
Maintaining accurate records is also important. Keep a log of your inspections, treatments, and feeding activities. This will help you track the health of your colony and identify any trends or patterns.
Harvesting Honey: From Hive to Jar
Finally, the sweet reward: harvesting honey! This typically occurs in late summer or early fall, after the bees have capped the honey cells. Remove the frames of capped honey from the hive and transport them to a clean, enclosed space. You’ll need an uncapping tool to remove the wax cappings from the honey cells.
Honey extraction can be done manually (using a knife or fork) or with an electric extractor. Electric extractors are more efficient but also more expensive. After extraction, filter the honey to remove any wax particles or debris. Bottling the honey in clean, airtight jars is the final step.
Proper honey storage is essential for maintaining its quality. Store honey in a cool, dark place. Crystallization is a natural process; if your honey crystallizes, you can decrystallize it by gently warming it in a water bath. Label your jars with the date and source of the honey.
Honey is a delicious and natural sweetener, but it’s also a valuable food source for your bees. Be sure to leave enough honey in the hive to sustain them through the winter.
No comments yet. Be the first to share your thoughts!