
Choosing the right hive type
Selecting a hive style dictates your equipment purchases and management style. The two dominant options are the Langstroth and the Top Bar hive. Each design serves different legal compliance requirements and harvest goals. Your choice determines the weight of the equipment you must lift and the frequency of inspections required by local health codes.
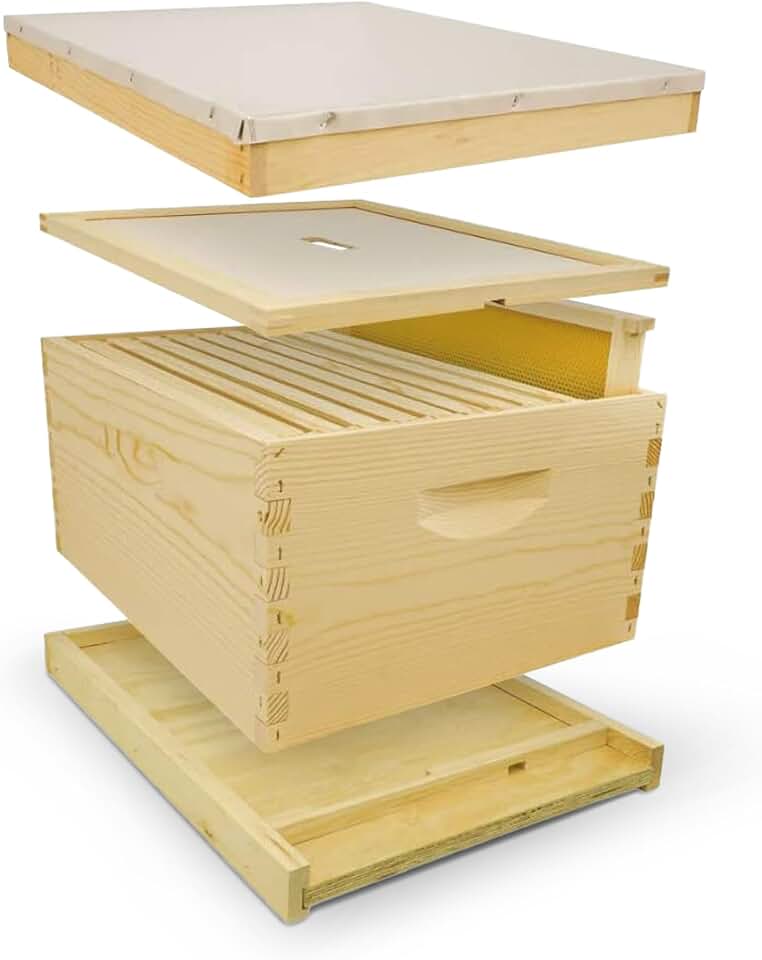
The Langstroth Hive
The Langstroth hive uses stacked boxes with movable frames. This design allows beekeepers to inspect individual frames without destroying the comb, making it the standard for commercial honey production and most local agricultural regulations. Because the frames are removable, you can manage pests like Varroa mites more precisely, a requirement in many jurisdictions with strict apiculture laws.
The primary drawback is weight. A fully drawn-out Langstroth deep box can exceed 80 pounds. This physical constraint means your starter kit must include robust handling tools, such as a hive stand and a sturdy smoker. The Little Giant 10 Frame Beginner Hive Kit is a common entry point for this style, providing the standardized boxes needed to comply with most county zoning ordinances.
The Top Bar Hive
Top Bar hives are horizontal structures where bees build comb from the top down. There are no heavy boxes to lift; instead, you inspect comb by removing individual bars. This design is often favored in urban or suburban settings where weight limits or zoning restrictions make traditional stacked hives difficult to manage. It requires less physical strength but demands a different inspection technique.
Top Bar hives generally produce less honey per inspection than Langstroth hives because the comb is not standardized. However, they are easier to maintain for hobbyists who prioritize bee health over maximum yield. If your local regulations restrict hive weight or require specific setback distances from property lines, a Top Bar hive may offer a more compliant and manageable solution.
Comparison of Hive Styles
The table below outlines the key differences between these two systems to help you align your kit purchase with your legal and physical constraints.
| Feature | Langstroth | Top Bar |
|---|---|---|
| Weight | Heavy (80+ lbs per box) | Light (individual bars) |
| Honey Yield | High (standardized frames) | Moderate (variable comb) |
| Inspection | Frame-by-frame | Bar-by-bar |
| Legal Compliance | Widely accepted standard | Check local zoning first |
Essential protective gear
Protective gear is the first line of defense against stings, which can cause panic and compromise hive inspections. For beginners, the right fit reduces anxiety and allows for focused, methodical work. Ill-fitting gear leaves gaps that bees can exploit, turning a routine check into a chaotic event. Prioritize full-coverage suits with reinforced knees and durable zippers over flimsy jackets.
The standard setup includes a ventilated veil, gloves, and a full-body suit. Ventilated veils are superior because they prevent fogging, ensuring clear vision when manipulating frames. Gloves should offer dexterity; thick leather is durable but clumsy, while nitrile-coated gloves provide better touch sensitivity for handling delicate brood patterns. Always check for allergic reactions before handling bees, even with gear.
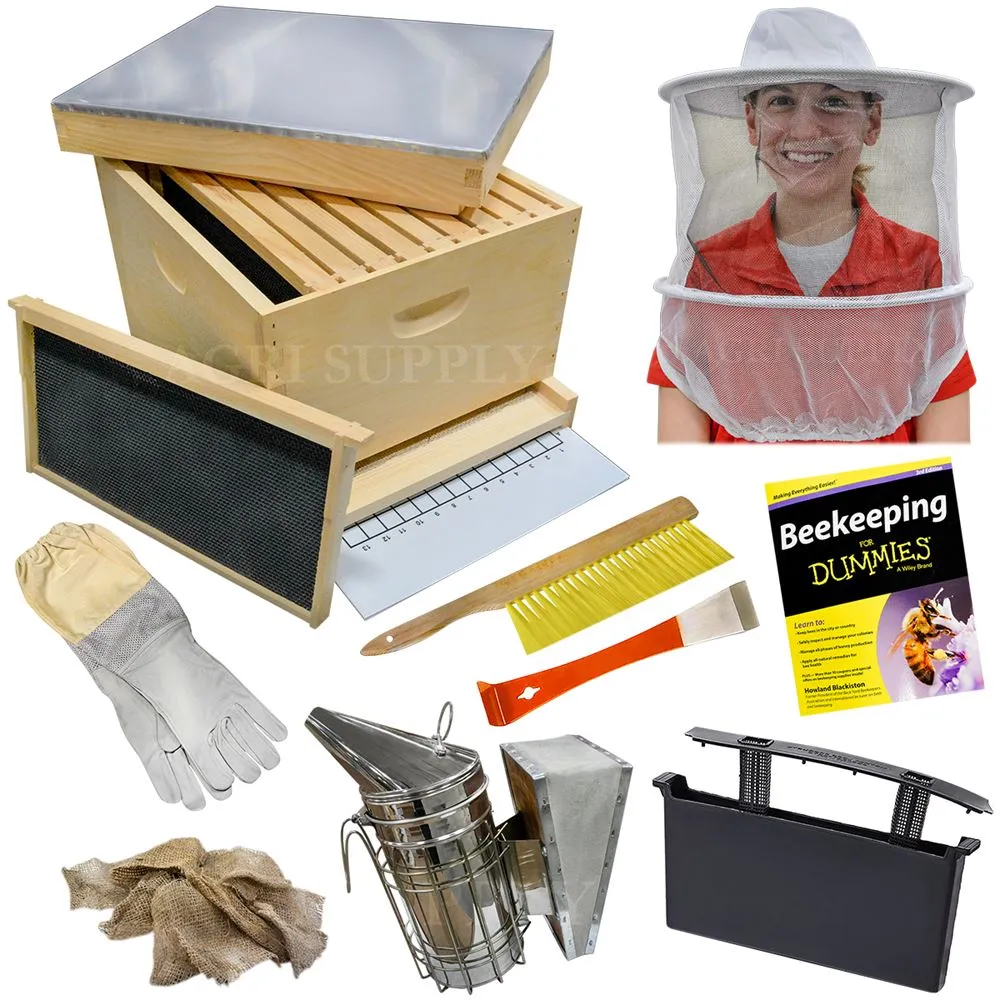
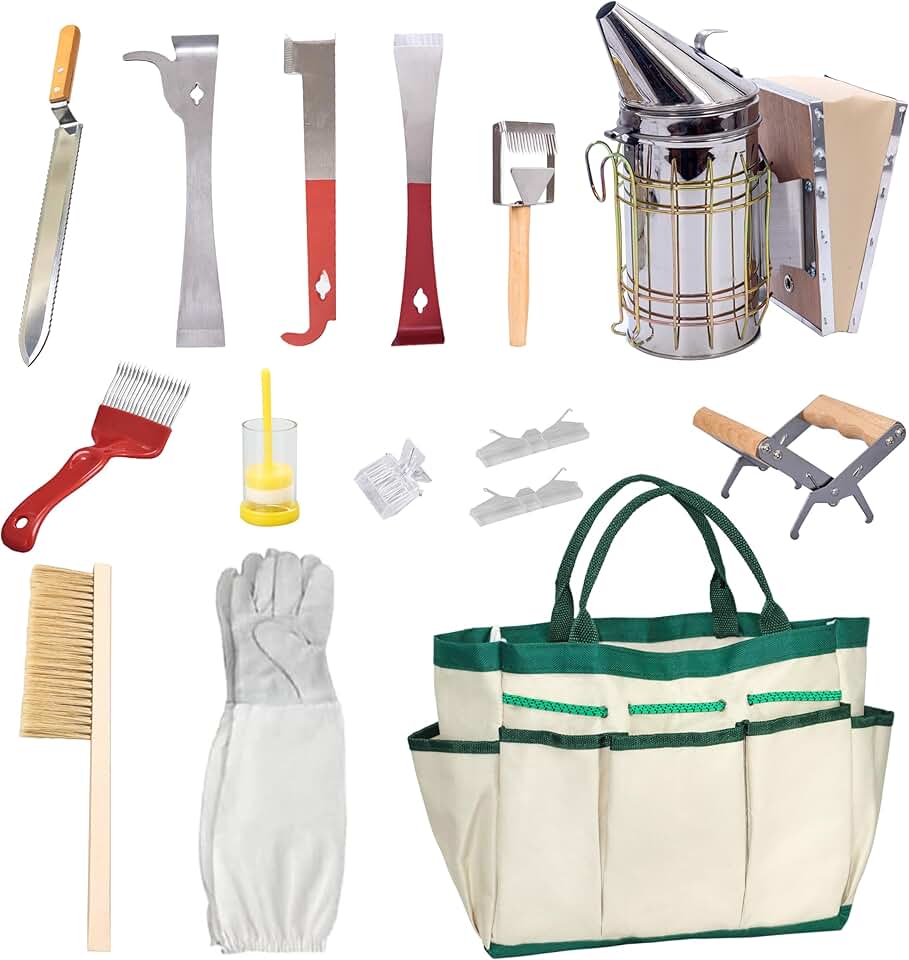
Recommended Protective Kits
These products represent widely accepted standards for beginner safety and durability.


As an Amazon Associate, we may earn from qualifying purchases.
Best beginner beekeeping kits for 2026
Starting an apiary requires specific equipment to ensure both the safety of the keeper and the health of the colony. Rather than sourcing individual components, beginner beekeeping kits provide a standardized set of gear. These bundles typically include a Langstroth hive body, frames, foundation, protective suits, and essential tools. This approach reduces the risk of purchasing incompatible parts and ensures you have the necessary items to comply with local zoning and health regulations.
The initial investment for a complete setup, including bees and feed, generally ranges from $1,000 for a single hive to $1,500 for two hives. While prices fluctuate based on seasonal demand and supplier availability, choosing a reputable kit manufacturer can help stabilize these costs. The following recommendations highlight widely available starter kits that include the core components needed for your first year.


As an Amazon Associate, we may earn from qualifying purchases.
When evaluating these kits, look for inclusion of a hive tool, which is essential for prying apart frames sealed with propolis. Ensure the protective gear meets industry standards for veil visibility and material durability. Some kits may exclude bees or nuc colonies, which must be sourced separately from a local supplier to ensure they are adapted to your regional climate and disease pressures.
Natural mite management basics
Varroa destructor mites are the single greatest threat to honeybee colonies in the United States. Unlike chemical treatments that leave residues, natural methods rely on mechanical and biological interventions to suppress mite populations below the economic injury level. For new beekeepers, integrating these techniques into the first-year management plan is essential for hive survival without compromising honey quality or violating local regulations.
Drone brood removal
Worker bees naturally cap drone brood with mites, making it a trap for the parasites. By removing and freezing frames containing drone brood every 21 days, you physically eliminate thousands of mites. This method is labor-intensive but leaves no chemical trace in the wax or honey. It works best when combined with regular monitoring using alcohol washes or sugar rolls to track population trends.
Screened bottom boards
Installing a screened bottom board allows mites that fall off bees to drop out of the hive rather than re-climbing onto hosts. While not a standalone solution, it provides passive mite reduction and improves ventilation. Pair this with regular cleaning of the screen to remove debris and dead mites, ensuring the hive remains hygienic and resistant to secondary infections.
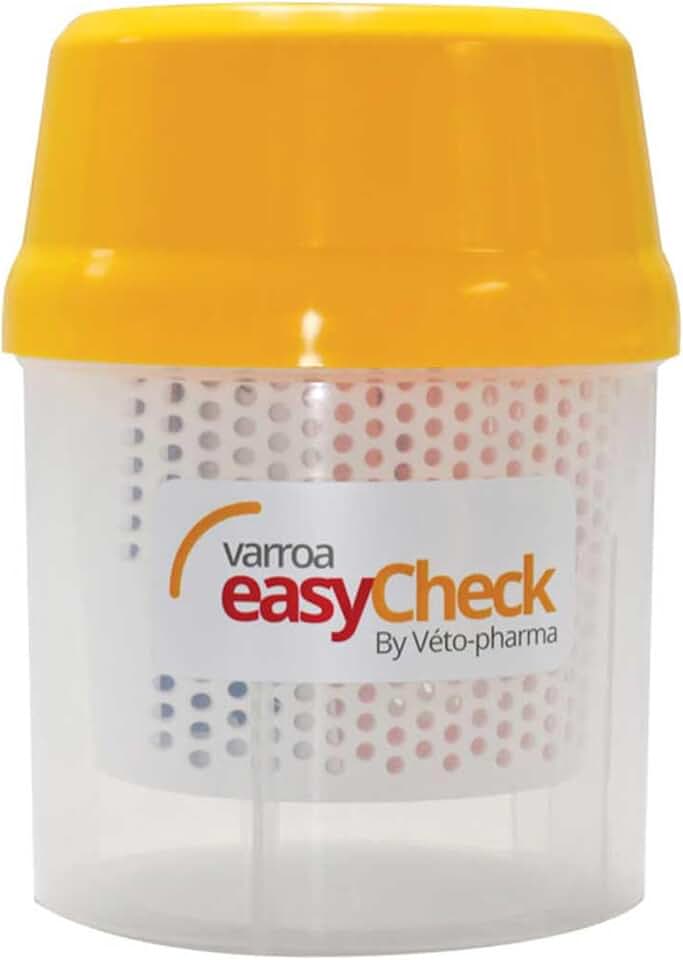
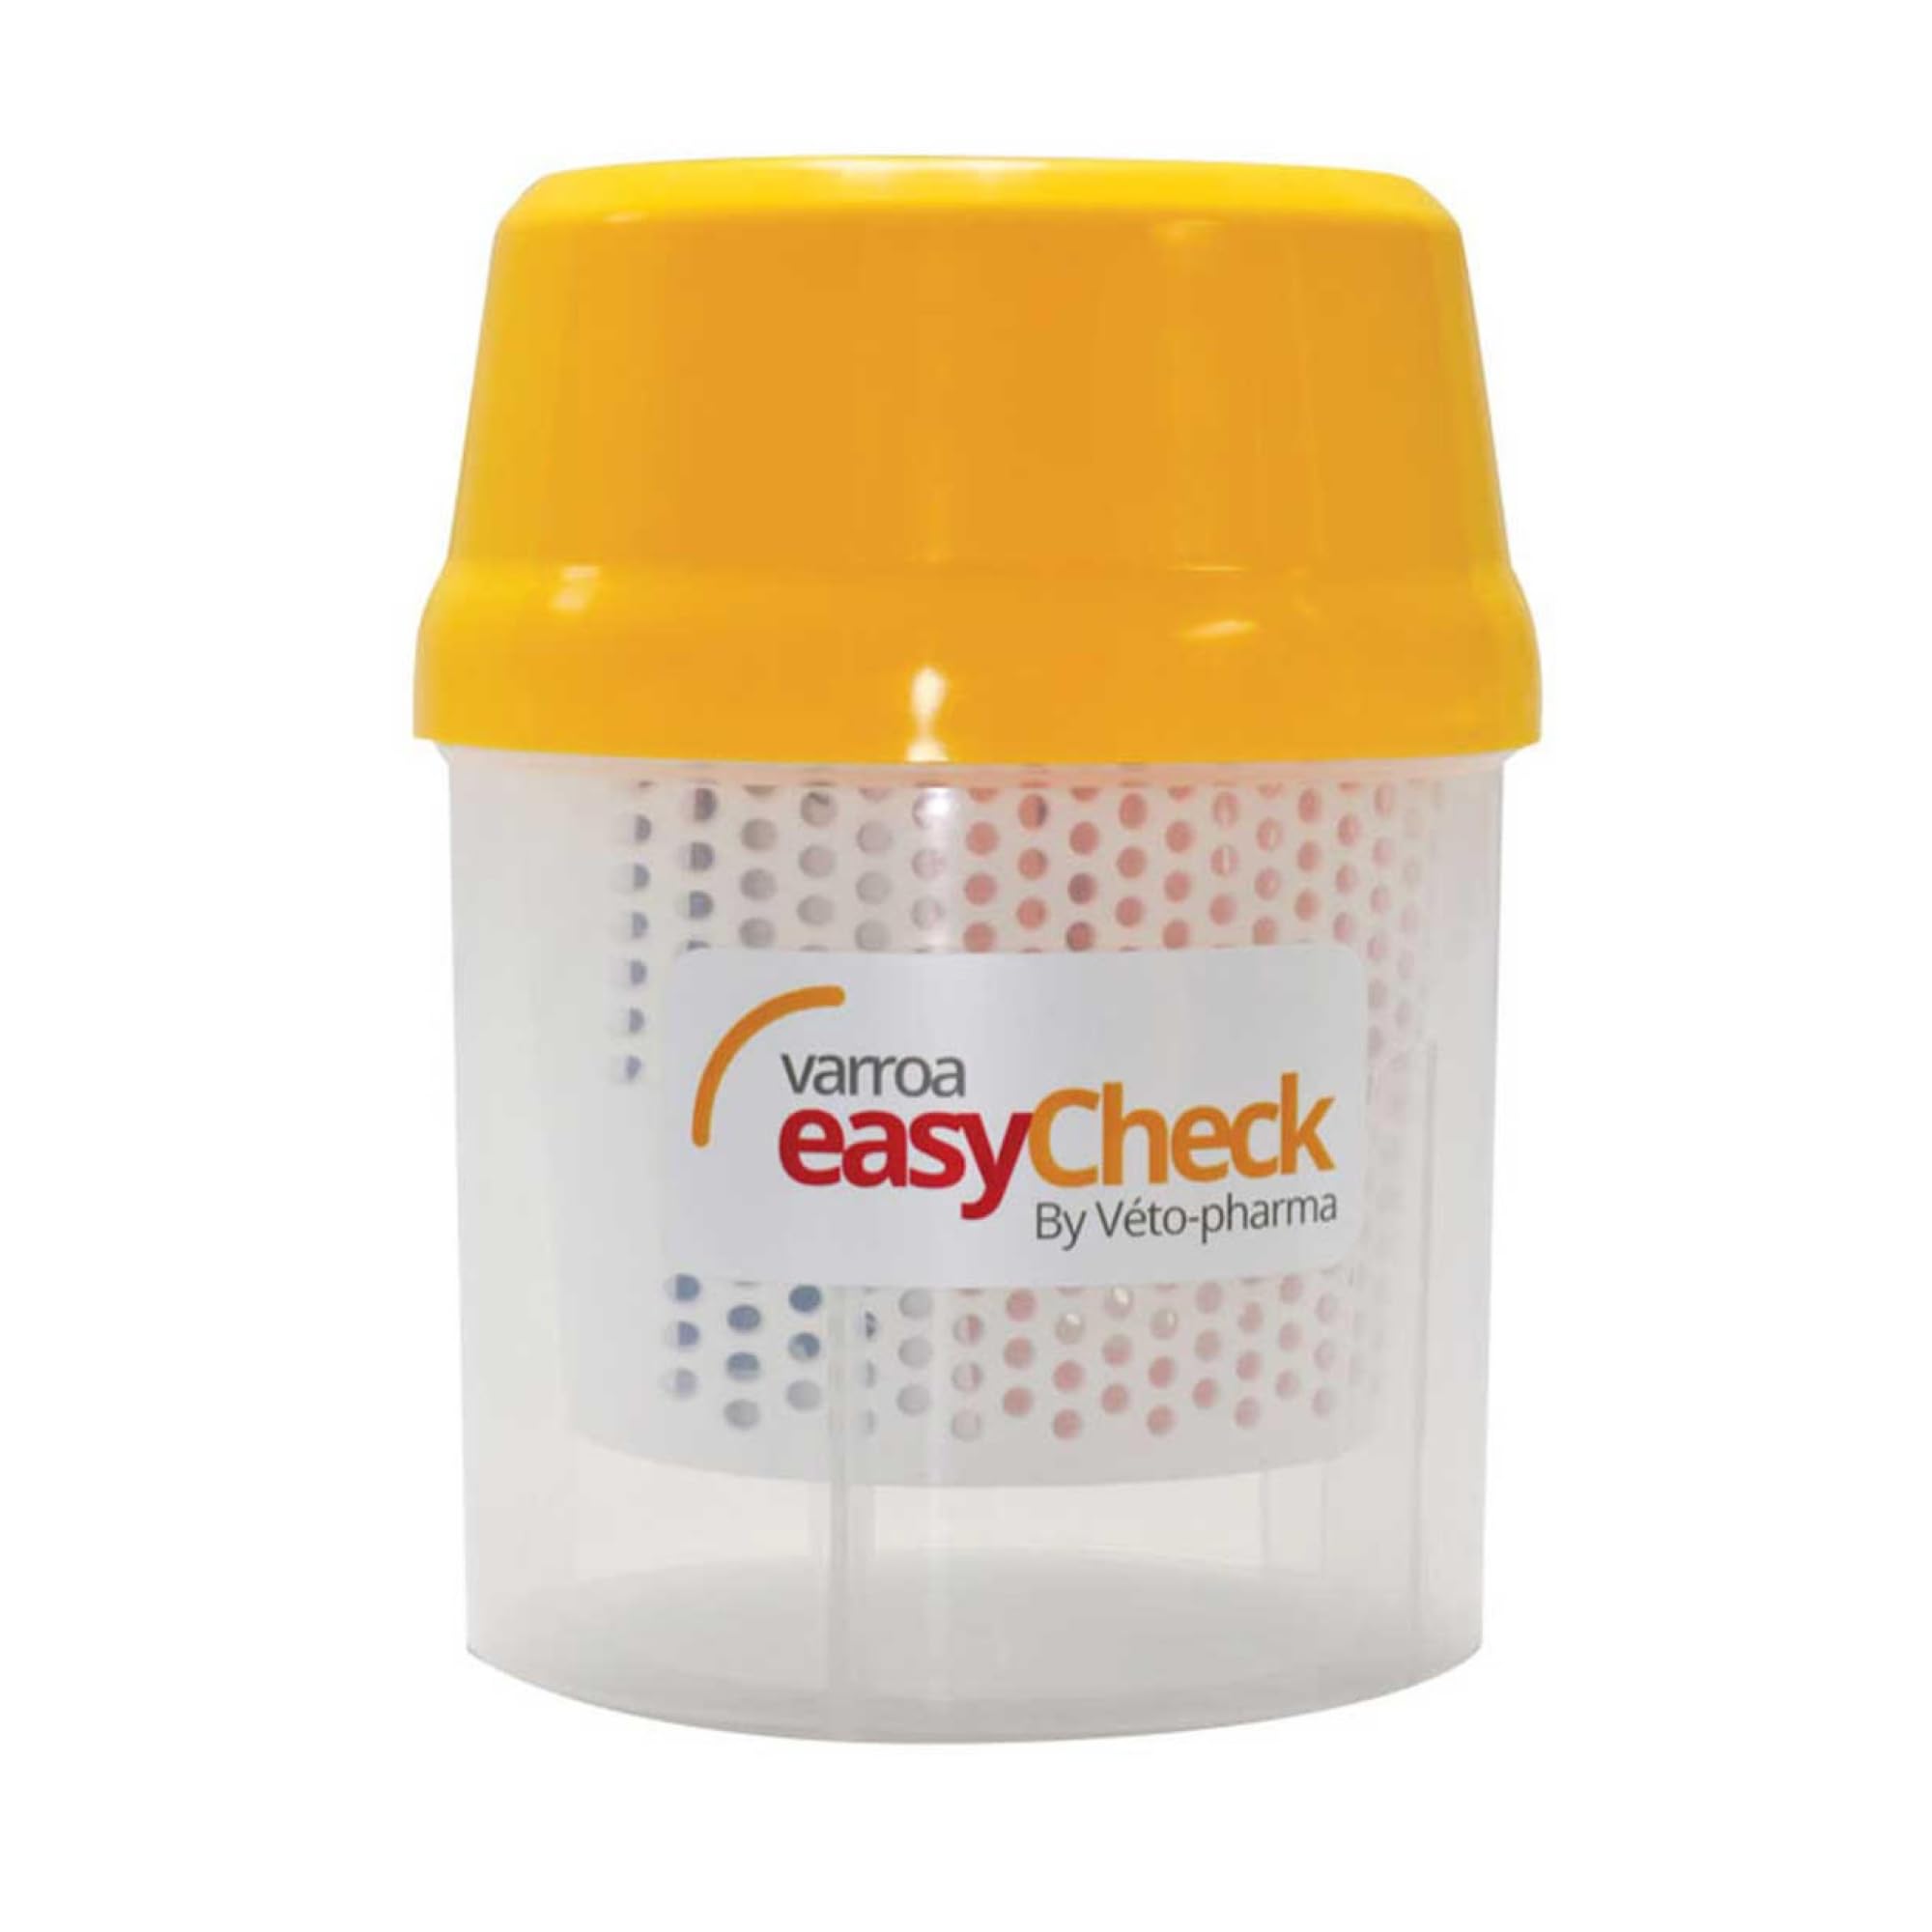
Essential mite monitoring tools
Accurate counting is the foundation of natural management. Without data, you cannot know if your interventions are working. These tools are standard in any beginner kit and are necessary for making informed decisions about when to intervene.

As an Amazon Associate, we may earn from qualifying purchases.
Biological suppressors
Some beekeepers introduce specific bee stocks, such as Russian bees or hygienic Italian bees, which have evolved traits to groom and remove mites more effectively. While not a "kit" item, selecting these genetic lines can reduce the frequency of manual interventions. Research from the University of Georgia indicates that hygienic behavior significantly lowers mite loads, offering a long-term biological buffer against infestation.
Local zoning and bee laws
Before assembling your first hive, verify that your municipality allows apiaries. Many cities distinguish between hobbyist and commercial operations, and some zones prohibit hives entirely. Even in areas where beekeeping is legal, setback requirements often mandate that hives sit at least 25 to 50 feet from property lines or neighboring structures. Ignoring these codes can result in fines or forced removal of your equipment.
Registration is another common hurdle. States like California, Texas, and New York require beekeepers to register their hives annually with the state department of agriculture. This process helps authorities track disease outbreaks like varroa mites or American foulbrood. You will typically need to provide the number of colonies and your contact information. Failure to register can void insurance coverage or complicate legal disputes with neighbors.
Homeowners associations (HOAs) may impose stricter rules than local laws. Check your covenants, conditions, and restrictions (CC&Rs) before purchasing gear. Some HOAs ban hives outright or require visual screening with fences or hedges. If you are unsure, request a written exemption from your HOA board before investing in starter kits.
First Year Inspection Schedule
The first year of beekeeping is defined by a seasonal rhythm rather than a rigid calendar. Inspections serve two primary functions: monitoring colony health and verifying that the bees are building comb and storing honey efficiently. For beginners using a standard 10-frame Langstroth setup, these checks help you identify issues like swarming tendencies or mite infestations before they become critical.
Spring: Buildup and Space Management
In early spring, inspect every 7–10 days. Your goal is to ensure the queen is laying well and the colony has enough drawn comb to expand. If the brood nest is congested, add a honey super to prevent premature swarming. This is also the window to check for Varroa mites using alcohol washes or sugar rolls, as recommended by state agricultural extensions.
Summer: Monitoring and Harvest Prep
By mid-summer, inspections can shift to every 2–3 weeks. Focus on honey flow and ventilation. Ensure the bees have adequate room to store nectar; if frames are capped with honey above the brood nest, the colony may feel crowded. Use a smoker sparingly to keep bees calm during these checks, especially in high-heat months.
Fall: Winter Prep and Mite Treatment
The final major inspection of the year occurs in late fall. Assess honey stores: a healthy colony needs 60–90 pounds of honey to survive winter. If stores are low, feed sugar syrup or fondant. Crucially, apply a mite treatment now if counts are high, as untreated mites in autumn lead to colony collapse in winter. This final check ensures your bees enter dormancy with sufficient resources and health.
Common beginner mistakes
New beekeepers often rush into inspections, treating the hive like a machine to be tuned rather than a living colony to be observed. Over-inspecting disrupts brood cycles and stresses the bees, leading to reduced honey production or colony collapse. Limit checks to every 7–10 days during the active season, and always work quickly and calmly to preserve the comb structure.
Site selection is equally critical. Placing hives in low-lying areas where cold air settles, or in spots with poor drainage, invites disease and winter loss. Ensure your apiary has morning sun, afternoon shade, and a windbreak. Check local zoning ordinances and homeowners association rules before installing your first Langstroth or top-bar hive to avoid legal disputes with neighbors.
Another frequent error is underestimating the need for protective gear. Wearing inadequate suits or gloves increases the risk of stings, which can trigger panic and aggressive behavior. Invest in a ventilated bee suit with sealed cuffs, such as those from Uncle Jim’s or Kiwi Supply, to maintain confidence and safety during routine maintenance.
No comments yet. Be the first to share your thoughts!