

Check local zoning and HOA rules
Before investing in hives or purchasing a single frame, you must verify that beekeeping is permitted on your property. Local zoning ordinances and homeowner association (HOA) bylaws vary significantly by jurisdiction, and non-compliance can result in fines or the forced removal of your colonies. This section outlines the compliance steps you should take to ensure your apiary is legal.
Municipal Zoning Codes
Most municipalities regulate beekeeping through zoning ordinances that specify whether hives are allowed in residential, commercial, or agricultural zones. Some cities impose restrictions on the number of hives per lot, while others require a minimum distance between hives and property lines or neighboring structures. These regulations are designed to balance beekeeping interests with neighborhood peace and safety.
To find the specific rules for your area, consult your city or county’s official zoning code. Many local governments publish these codes online, often through their planning or zoning department websites. Look for sections titled "Agriculture," "Animals," or "Apiaries." If the code is unclear or does not mention bees, contact your local zoning administrator for clarification. University extension offices can also provide guidance on interpreting local regulations.
Homeowner Association Bylaws
If you live in a community governed by an HOA, your property may be subject to additional restrictions. HOA bylaws often contain covenants, conditions, and restrictions (CC&Rs) that prohibit or limit the keeping of livestock or animals, which may include bees. Even if municipal law permits beekeeping, HOA rules can override this permission for properties within the association’s jurisdiction.
Review your HOA’s governing documents carefully. Look for any clauses that restrict "livestock," "animals," or "structures" on your property. If the language is ambiguous, request a formal interpretation from the HOA board or legal counsel. Some HOAs have specific provisions for beekeeping, while others prohibit it entirely. In some cases, you may need to apply for a variance or seek a waiver from the board.
Compliance Steps
- Research Local Ordinances: Check your city or county’s zoning code for beekeeping regulations.
- Review HOA Documents: Examine your HOA bylaws for restrictions on animals or structures.
- Contact Authorities: If uncertain, consult your local zoning administrator or HOA board.
- Document Permissions: Keep records of any approvals or variances granted.
Next Steps
Once you have confirmed that beekeeping is legal on your property, you can proceed with purchasing equipment and selecting a site for your hives. Ensure that your chosen location meets all setback requirements and is accessible for maintenance. Proper planning at this stage will help you avoid costly mistakes and ensure a successful first year of beekeeping.
Assemble essential protective gear
Handling bees safely requires specific protective equipment to prevent stings and ensure clear vision during inspections. This gear serves as the primary barrier between the apiarist and the colony’s defensive instincts. While local regulations do not typically mandate specific brands of protective clothing, safety standards established by agricultural extensions and occupational health guidelines define the necessary components for safe operation.
The Bee Suit or Jacket
A full-body bee suit or a ventilated jacket provides comprehensive coverage. These garments are typically made from lightweight, breathable cotton or poly-cotton blends to prevent overheating during summer inspections. The suit must feature zippers with storm flaps to prevent bees from entering through gaps. Gloves are often integrated into the suit or worn separately; thick leather gloves offer dexterity but can reduce tactile sensitivity, while thinner nitrile gloves provide better feel with adequate protection.
Veil and Head Protection
The veil is the most critical component for facial protection. It must be securely attached to the hat or suit collar without gaps. A standard round veil or a rectangular jacket veil should allow for a wide field of vision. Clear, non-fogging mesh is preferred to maintain visibility during detailed hive inspections. Ensure the veil is clean and free of holes that could allow stingers to penetrate.
Boots and Cuffs
Bee suits often include elasticized cuffs at the wrists and ankles to seal the garment against the skin. Boots should be worn with the suit pants tucked inside or secured with elastic bands to prevent bees from crawling up the legs. Leather boots are durable and easy to clean, but rubber boots can be hosed down to remove propolis and wax debris.
Hive Tool and Smoker
While not protective gear, a hive tool and smoker are essential for safe handling. The smoker calms bees by masking alarm pheromones, reducing the likelihood of defensive behavior. The hive tool is used to pry apart frames sealed with propolis, allowing for smooth and quick inspections that minimize stress on the colony.
Note: This information is for educational purposes only and does not constitute legal advice. Always consult local agricultural extension services and municipal codes for specific regulations regarding beekeeping in your jurisdiction.
Select a standard Langstroth hive
Beginners should select a standard Langstroth hive. This design is the industry baseline. It offers the widest availability of replacement parts. It also has the most educational resources available.
The Langstroth hive uses stacked rectangular boxes. Bees build comb inside removable frames. These frames fit into the boxes. This setup allows beekeepers to inspect hives without damaging the colony. It also makes honey harvesting easier.
Most local beekeeping associations teach the Langstroth method. This standardization helps new beekeepers find mentorship. It also simplifies buying equipment. Local suppliers typically stock Langstroth components. This reduces shipping costs and wait times.
The University of Georgia Extension notes that standardization aids new beekeepers. They recommend starting with widely available equipment. This approach minimizes initial learning curves. It also ensures that support is accessible.
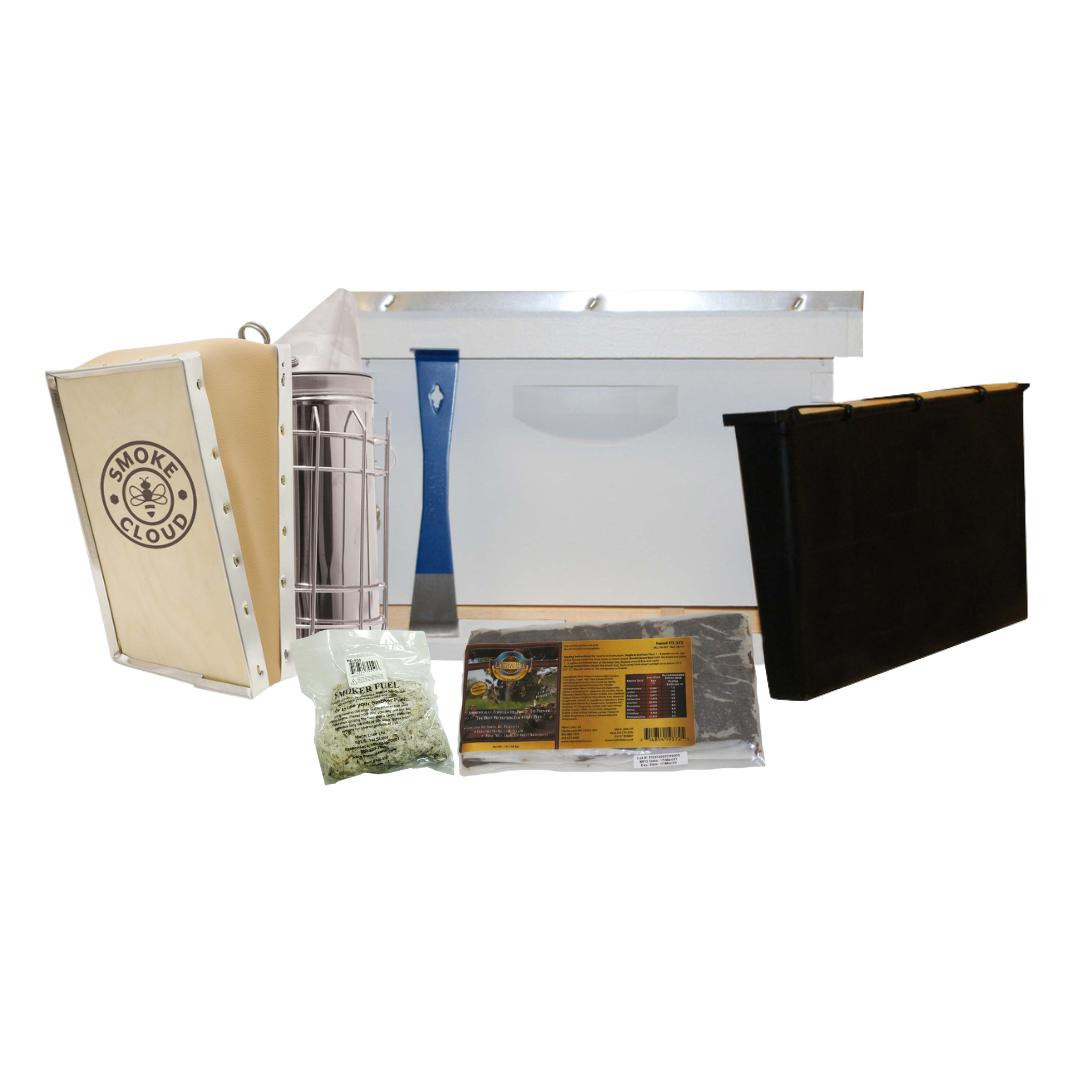
Check your municipal codes before purchasing. Some areas restrict hive types. They may require specific spacing or registration. Always verify local rules before investing in equipment.
Source bees and initial supplies
Securing live bees and assembling the necessary equipment are the first practical steps in establishing a legal apiary. This process requires distinguishing between package bees and nucleus colonies, then verifying that all local zoning ordinances and health permits are in place before installation. This information serves as a general educational overview and does not constitute legal advice; consult your municipal code and state department of agriculture for binding regulations.
Package bees versus nucleus colonies
Beginners typically choose between package bees and nucleus colonies (nucs). A package contains three pounds of bees and a queen in a screened box, offering no built-in comb or food stores. A nuc is a small, established colony with drawn comb, brood, honey, and pollen, providing a head start in colony development. University extension services often recommend nucs for their higher survival rates in the first season, though both require immediate inspection and feeding protocols to comply with local health standards.

Essential equipment checklist
Proper tooling ensures safe handling and regulatory compliance during inspections. The following items are standard for initial setup:
- Hive tool: A flat metal bar used to pry apart frames sealed with propolis.
- Smoker: Generates cool smoke to calm bees during hive inspections.
- Protective suit: Includes a veil, gloves, and jacket to prevent stings.
- Feeders: Devices for providing sugar syrup when natural nectar flows are insufficient.
- Frames and foundation: Wooden or plastic structures that guide comb construction.
Before installing bees, verify that your hive boxes, frames, and foundation are clean and properly assembled. Ensure your chosen location meets setback requirements from property lines and neighbors as defined by your local jurisdiction.
-
Assemble hive boxes and secure bases
-
Install frames and foundation correctly
-
Set up feeder with sugar syrup solution
-
Verify protective gear is intact and accessible
-
Confirm hive location meets local zoning setbacks
Plan seasonal inspection schedule
A structured inspection timeline is essential for maintaining hive health and ensuring regulatory compliance. Beekeeping operations are subject to state and local regulations that often mandate specific health checks, particularly regarding disease prevention and swarm control. Adhering to a consistent schedule helps identify issues early, reducing the risk of colony collapse and potential fines from agricultural departments. This schedule is not legal advice; always consult your local agricultural extension service for jurisdiction-specific requirements.
Spring: Buildup and Swarm Prevention
Spring inspections, typically beginning in March or April depending on your climate, focus on colony expansion and resource management. Check for sufficient brood space and food stores. The University of Georgia College of Agriculture and Environmental Sciences notes that new colonies require frequent monitoring during this period to prevent swarming, which can be considered a public nuisance or pest issue in some municipalities. Ensure ventilation is adequate to prevent overheating, which can stress the colony and lead to erratic behavior.
Summer: Mite Monitoring and Honey Flow
During the summer months, inspections should shift toward pest management, specifically Varroa destructor mites, which are a primary vector for viral diseases. Many states require beekeepers to report mite infestations or maintain treatment logs. Monitor honey stores to ensure the colony has enough reserves for the upcoming winter. If local ordinances require notification of hive locations, this is the time to verify that your registration is up to date and that your apiary remains in compliance with setback distances from property lines.
Fall: Winter Preparation
Fall inspections are critical for winter readiness. Assess the colony’s strength and ensure they have enough honey and pollen stores to survive the colder months. Remove any supers that are not needed for winter insulation. Check for signs of chalkbrood or other fungal diseases that can weaken the colony. In many jurisdictions, beekeepers must submit annual health declarations or pay renewal fees during this period. Ensure your hive is properly marked with your registration number, as required by law, to facilitate inspection by agricultural officials.
Winter: Minimal Disturbance
Winter inspections should be minimal and conducted only on mild, sunny days. The primary goal is to ensure the colony has enough food and that entrances are clear of snow and ice. Do not open the hive unless necessary, as this can disrupt the cluster and lead to rapid heat loss. Keep records of any observations, as these logs may be required for compliance audits or insurance purposes in the event of a colony loss.
Common beginner: what to check next
This section addresses frequent inquiries regarding bee behavior, regulatory expectations, and first-year yields. The information below synthesizes data from university extension services and established beekeeping resources. This content is for educational purposes only and does not constitute legal advice. Always consult your local municipal codes and state regulations for binding requirements.
For detailed guidance on seasonal care and mite control, refer to the University of Georgia’s College of Agricultural and Environmental Sciences beginner’s guide. These resources provide region-specific advice that complements general best practices.
No comments yet. Be the first to share your thoughts!