

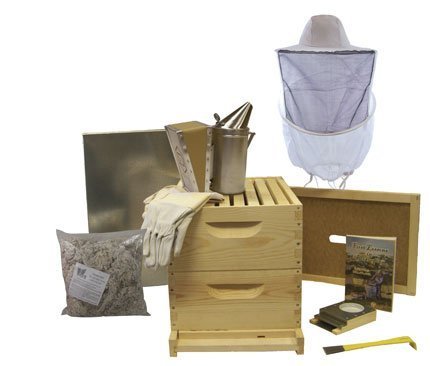
Essential gear for your first hive
Use this section to make the Beekeeping decision easier to compare in real life, not just on paper. Start with the reader's actual constraint, then separate must-have requirements from details that are merely nice to have. A practical choice should survive normal use, maintenance, timing, and budget. If a recommendation only works in an ideal situation, call that out plainly and give the reader a fallback path.
The simplest way to use this section is to write down the must-have criteria first, then compare each option against those criteria before weighing nice-to-have features.
Choosing the right hive style
Selecting a hive is the first major decision in beginner beekeeping. The three main styles—Langstroth, Warre, and Top Bar—differ significantly in cost, physical demand, and harvest method. Your choice should align with your physical ability and how much honey you expect to harvest.
Langstroth: Standard and Efficient
The Langstroth hive is the industry standard in the United States. It uses stacked boxes and removable frames, allowing beekeepers to inspect individual combs without destroying the hive structure. This modularity makes it easy to expand the colony by adding more boxes as needed.
However, the stacked design requires lifting heavy boxes full of honey, which can be physically demanding. The harvest is typically done by extracting frames in a centrifuge, which yields clean liquid honey but requires additional equipment. It is the best choice for those prioritizing high honey yields and easy expansion.
Warre: Natural and Low-Impact
Warre hives are designed to mimic natural tree cavities, using vertical boxes that are added only from the bottom. Beekeepers harvest from the top, taking only excess honey from the uppermost box while leaving the brood and lower stores intact. This minimizes disturbance to the bees and reduces the need for frequent inspections.
This method is physically gentle, as you never lift heavy, full boxes. The trade-off is that harvests are smaller and wax comb is often sold rather than extracted into liquid. It suits beginners who value low-impact management and natural bee behavior over maximum honey production.
Top Bar: Horizontal and Accessible
Top Bar hives are horizontal structures where bees build comb from hanging bars. Because the hive lies flat on the ground, there is no lifting involved. Inspections are simple: you lift one bar at a time. This makes it the most physically accessible option for those with back issues or limited strength.
Harvesting is more labor-intensive per unit of honey because comb is often cut out and crushed to extract juice, or sold as cut-comb. The hive is also harder to expand vertically. It is ideal for beginners who want to avoid heavy lifting and prefer a hands-on, ground-level interaction with their colony.
Comparison of Hive Styles
| Feature | Langstroth | Warre | Top Bar |
|---|---|---|---|
| Physical Strain | High (lifting heavy boxes) | Low (harvest from top) | Very Low (horizontal access) |
| Harvest Method | Extracted liquid honey | Comb honey (upper box) | Crush-and-strain or cut-comb |
| Inspection | Easy (frame-by-frame) | Minimal (bottom-up addition) | Moderate (bar-by-bar lift) |
| Best For | High yield & expansion | Low-impact & natural flow | Accessibility & low cost |
The 7/10 rule for inspections
Use this section to make the Beekeeping decision easier to compare in real life, not just on paper. Start with the reader's actual constraint, then separate must-have requirements from details that are merely nice to have. A practical choice should survive normal use, maintenance, timing, and budget. If a recommendation only works in an ideal situation, call that out plainly and give the reader a fallback path.
The simplest way to use this section is to write down the must-have criteria first, then compare each option against those criteria before weighing nice-to-have features.
Seasonal timeline for year one
Use this section to make the Beekeeping decision easier to compare in real life, not just on paper. Start with the reader's actual constraint, then separate must-have requirements from details that are merely nice to have. A practical choice should survive normal use, maintenance, timing, and budget. If a recommendation only works in an ideal situation, call that out plainly and give the reader a fallback path.
-
Verify the basicsConfirm the core specs, condition, and fit before comparing extras.
-
Price the downsideLook for the repair, maintenance, or replacement cost that would change the decision.
-
Compare alternativesCheck at least two comparable options before treating one listing as the benchmark.
No comments yet. Be the first to share your thoughts!